Getting Started with Shopify Webhooks: A Practical Setup Guide

Learn how to set up Shopify webhooks, handle events, secure endpoints, and automate workflows for orders, products, and variants efficiently.
Running a Shopify store often means juggling constant updates, orders keep coming, a product might get edited, causing stock to change, or a customer might update their details. Now imagine your CRM, shipping tool, or internal system needing that information right away, but nothing alerts them.
You’re left checking things manually, and the moment you miss something, the next task falls out of place. This is exactly what Webhooks help to fix. They notify your systems the instant something changes, so your workflows stay aligned without constant supervision.
This guide walks through setting up Shopify webhooks, receiving and verifying them, testing the end-to-end flow, and building reliable automation from start to finish.
Quick Overview
- Shopify webhooks let you stream real-time updates to any external system without overusing the Admin API.
- You must secure, log, and version your webhook handlers to prevent failures and maintain long-term stability.
- Use queues, retries, and async processing to scale reliably as order volume or catalog size grows.
- Real-world workflows such as ERP syncs, PIM updates, WMS inventory, and Klaviyo triggers depend on accurate payload handling.
- Stores using StarApps’ advanced variant/image structures can use webhooks to extend precise product data across all external tools.
What Are Shopify Webhooks?
Shopify webhooks are automated notifications that Shopify sends to your server whenever a specific event occurs in your store. Instead of repeatedly polling the API to check for changes, your system receives the update as soon as it occurs.
Webhooks vs. API Polling
API polling requires your system to ask Shopify for updates at regular intervals. This creates delays, unnecessary API usage, and often misses time-sensitive changes. Webhooks reverse the process, so Shopify pushes updates to you instantly.
Where Webhooks Become Essential
- Inventory syncing: update stock levels across channels without delays.
- Variant updates: keep variant data consistent in external systems.
- Product catalog automation: trigger scripts whenever products or images change.
- ERP / CRM / 3PL integrations: send accurate, real-time data into external tools.
With the fundamentals clear, it’s time to look at the real triggers you’ll rely on day-to-day.
Common Shopify Webhook Events (Topics) You Will Use
Shopify offers many webhook topics, but a handful show up in most real-world setups. These events help keep your internal systems, automations, or integrations aligned with what’s happening in your store.
Key Events to Know
- orders/create: Triggers when a new order is placed. Useful for sending order data to ERPs, 3PLs, or internal dashboards.
- orders/fulfilled: Fires when an order is marked fulfilled. Often used for shipment notifications, customer communication, or syncing fulfillment data to external tools.
- products/update: Sends an event whenever product details change. Helpful for keeping product catalogs, marketing feeds, or external databases current.
- variants/update: Alerts your system when specific variants are modified. This matters for price changes, option adjustments, and variant-level metadata.
- inventory_levels/update: Notifies you when stock quantities rise or fall. Ideal for stock syncing across marketplaces or inventory systems.
- customers/create: Triggers when a new customer account is created. Often used for CRM sync, segmentation pipelines, or marketing automation tools.
- app/uninstalled: Signals that your app has been removed from a store. Critical for cleaning up data or stopping scheduled tasks.
Once you’ve selected the webhook events you’ll use, it’s important to understand how Shopify sends them and what happens if your system doesn’t respond.
Shopify Webhook Delivery Logic & Retry Behavior
Shopify sends webhooks with a clear delivery and retry pattern so your systems always have multiple chances to receive the event.
How Delivery and Retries Work
When Shopify sends a webhook, it expects a successful response from your server. If it doesn’t get one, it retries the request with an exponential backoff, waiting longer between attempts. Shopify makes up to 14 attempts in total.
What Counts as a Success or Failure
- Success: Any 2xx HTTP status code (200, 201, 204, etc.).
- Failure: Any non-2xx response, including timeouts, 4xx errors, and 5xx errors.
Expected Response Time
Your endpoint should respond within 5 seconds. If it takes longer, Shopify treats it as a failure even if your server eventually finishes processing the task. A common approach is to respond immediately and handle any heavy work asynchronously.
If All Attempts Fail
After all 14 retries, Shopify marks the webhook as failed and stops trying. You can review these failures in your store’s webhook logs, which helps you identify issues like downtime, incorrect URLs, or validation errors.
Webhook delivery rules only work in your favor if your system is ready to receive the data. That starts with choosing and configuring a stable, secure endpoint.
Also, Check: How to Use Shopify Variant Conditional Logic Tools.
Prepare Your Endpoint URL for Receiving Webhooks
Before adding any webhook in Shopify, you’ll need a stable endpoint that can accept incoming requests. This endpoint acts as the “listener” for every event Shopify sends.
What Is an Endpoint?
It’s a URL on your server or serverless function where Shopify delivers webhook data. When an event occurs, Shopify sends a POST request to this URL with the payload.
HTTPS Is Mandatory
Shopify only sends webhooks to HTTPS URLs for security. This applies to both production and staging environments.
Recommended Ways to Host Your Webhook Endpoint
- Serverless functions: Services like AWS Lambda, Google Cloud Functions, or Vercel Serverless are ideal because they scale automatically and handle traffic spikes without extra setup.
- Dedicated webhook handler on your server: Create a separate route or microservice exclusively for webhooks so regular traffic doesn’t interfere.
- Use queues for heavy workloads: When payloads are large or frequent, send the webhook data to SQS, Redis, or RabbitMQ. This keeps your endpoint fast while background workers handle the heavy processing.
- Local testing options
- ngrok: exposes your local server to the internet.
- Shopify CLI: offers built-in tunneling suitable for app development.
For stores that manage large or variant-heavy catalogs, a queue helps prevent timeouts during webhook processing. Apps like StarApps’ Variant Image Automator and Combined Listings integrate seamlessly with this setup by keeping product and variant data structured and consistent.
Create a Webhook Manually in Shopify Admin
Shopify allows you to configure webhooks directly from the admin panel. This method works well for quick setups, testing, or stores that only need a few events tracked.
Step-by-Step Process
- Go to Settings in your Shopify admin.
- Select Notifications.
- Scroll down to the Webhooks section.
- Click Create webhook.
- Choose the event you want to listen to—such as orders/create or products/update.
- Select your preferred format.
- JSON (recommended): easier to parse, widely supported.
- XML: only use if a legacy system requires it.
- Enter your endpoint URL (must be HTTPS).
- Click Save.
After saving, you can manually trigger a test notification in the Webhooks section to confirm your endpoint is reachable. Once the webhook is created, the next step is choosing the right event type, format, and delivery settings.
Recommended Read: How to Bulk Edit Variants on Shopify: A Complete Step-by-Step Guide.
Webhook Configuration: Choosing the Correct Event, Format & URL
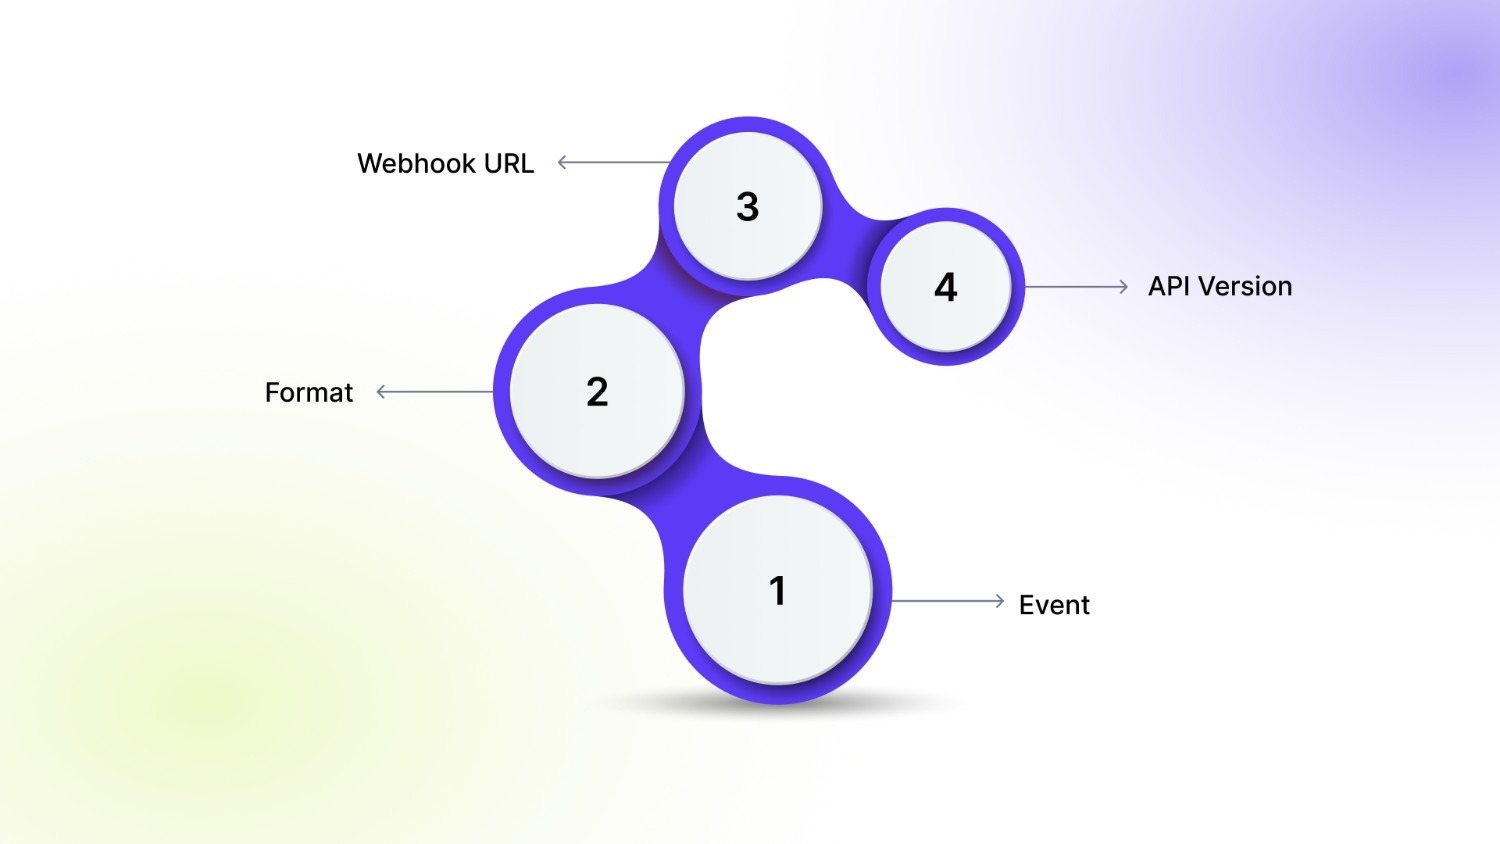
In the “Create Webhook” screen in the Shopify admin, each option you choose affects how your automation behaves.
1. Event
This defines which Shopify action will trigger the webhook. Choose the event that aligns with the workflow you want to automate.
Examples
- orders/create: send new orders to an ERP or fulfillment partner
- products/update: refresh product feeds or sync product details to external systems
- variants/update: update variant-level information in inventory, pricing, or PIM tools
2. Format
Shopify lets you choose between JSON and XML.
- JSON (recommended): easier to work with, supported by most modern systems, cleaner structure.
- XML: only use if your receiving system requires it.
3. Webhook URL
This is the HTTPS endpoint where Shopify will send the payload. Make sure to check for the following:
- It accepts POST requests
- It responds within 5 seconds
- It returns a 2xx status code
Your URL should remain stable. If it changes, update it in Shopify immediately.
4. API Version
Shopify versioning ensures that webhook payload structures remain predictable. Always pick the latest stable API version unless you need compatibility with an older system.
Mapping Events to Real Use Cases
Here’s a quick reference to help choose the right event:
- ERP Sync → orders/create: Send order data directly into ERP or accounting software as soon as an order is placed.
- Product Feed → products/update: Update external product feeds, search indexes, or marketing platforms when product details change.
- Variant Management → variants/update: Keep pricing, inventory, or variant metadata aligned when variant-level attributes change inside Shopify.
Now, the next step is securing each webhook request before you process it.
Secure Your Shopify Webhook (HMAC Validation + Auth)
Webhooks carry sensitive store data, and it’s crucial to ensure that incoming requests actually come from Shopify. Securing your webhook prevents malicious actors from sending fake payloads that could disrupt workflows or compromise data.
Why Security is Important?
Without proper validation, any public endpoint can receive requests pretending to be Shopify. This can result in:
- Incorrect data updates
- Automated processes running on fake events
- Exposure of sensitive store information
Shopify HMAC SHA256 Signature
Shopify signs every webhook with an HMAC SHA256 hash. This signature is included in the X-Shopify-Hmac-Sha256 header. Your server can compute the hash using your shared secret and compare it with the header to verify authenticity.
How to Validate a Webhook
Node.js Example:
const crypto = require('crypto');
function verifyWebhook(req, secret) {
const hmacHeader = req.headers['x-shopify-hmac-sha256'];
const body = req.rawBody; // raw request body
const hash = crypto
.createHmac('sha256', secret)
.update(body, 'utf8')
.digest('base64');
return hash === hmacHeader;
}
Python Example
import hmac, hashlib, base64
def verify_webhook(data, hmac_header, secret):
digest = hmac.new(secret.encode(), data, hashlib.sha256).digest()
calculated_hmac = base64.b64encode(digest).decode()
return hmac.compare_digest(calculated_hmac, hmac_header)
PHP Example
$hmac_header = $_SERVER['HTTP_X_SHOPIFY_HMAC_SHA256'];
$calculated_hmac = base64_encode(hash_hmac('sha256', $data, $secret, true));
if (hash_equals($calculated_hmac, $hmac_header)) {
// Valid webhook
}
Common Issues you may encounter:
- Using the parsed JSON body instead of the raw request body when calculating HMAC
- Missing or incorrect X-Shopify-Hmac-Sha256 header
- Encoding mismatches (UTF-8 vs others)
- Responding with non-2xx status codes on verification failure
Proper HMAC validation ensures that only legitimate Shopify events trigger your workflows, protecting both your store and connected systems.
Create Webhooks Programmatically via Shopify Admin API
Instead of manually creating webhooks in the Shopify admin, you can register, update, or delete them programmatically using Shopify’s REST or GraphQL Admin APIs. This is especially useful for stores with multiple webhooks, automated setups, or apps that need dynamic event handling.
1. Register a Webhook
REST Admin API Example (Node.js)
const fetch = require('node-fetch');
const shop = 'your-store.myshopify.com';
const accessToken = 'your-access-token';
const webhookData = {
webhook: {
topic: 'orders/create',
address: 'https://your-endpoint.com/webhooks',
format: 'json'
}
};
fetchhttps://${shop}/admin/api/2026-01/webhooks.json, {
method: 'POST',
headers: {
'Content-Type': 'application/json',
'X-Shopify-Access-Token': accessToken
},
body: JSON.stringify(webhookData)
})
.then(res => res.json())
.then(json => console.log(json));
GraphQL Example
mutation webhookCreate {
webhookSubscriptionCreate(
topic: ORDERS_CREATE
webhookSubscription: {
callbackUrl: "https://your-endpoint.com/webhooks"
format: JSON
}
) {
userErrors {
field
message
}
webhookSubscription {
id
}
}
}
2. Update a Webhook
Use the REST PUT endpoint with the webhook ID to update its address or topic.
PUT /admin/api/2026-01/webhooks/{webhook_id}.json
3. Delete a Webhook
Send a DELETE request to remove a webhook by ID.
DELETE /admin/api/2026-01/webhooks/{webhook_id}.json
4. Retrieve Existing Webhooks
REST: GET /admin/api/2026-01/webhooks.json
Meanwhile, for GraphQL, use: query webhookSubscriptions to list all active webhooks with topics and callback URLs
Programmatic management makes it easier to maintain multiple webhooks across development, staging, and production environments without manually editing each one in Shopify Admin. It also allows dynamic updates as your store grows or your automation needs change.
Also Read: How to Add, Manage & Optimize Multiple Product Options in Shopify.
However, before building any logic, take a look at the structure of the webhook payloads.
Webhook Payload Examples (Real JSON Samples)
Each event contains a JSON object with relevant details about the resource that triggered it.
1. orders/create Example
{
"id": 1234567890,
"email": "customer@example.com",
"created_at": "2026-01-11T10:00:00-05:00",
"total_price": "99.99",
"line_items": [
{
"id": 987654321,
"title": "T-Shirt",
"variant_id": 111222333,
"quantity": 2,
"price": "49.99"
}
],
"customer": {
"id": 555666777,
"first_name": "John",
"last_name": "Doe"
}
}
Key Fields Merchants Use:
- id → Order ID
- line_items → Products purchased
- total_price → Total order value
- customer → Customer details
2. products/update Example
{
"id": 1122334455,
"title": "Classic Hoodie",
"body_html": "<p>Warm and comfortable hoodie</p>",
"vendor": "Brand Name",
"variants": [
{
"id": 9988776655,
"title": "Red / Small",
"price": "59.99",
"sku": "RED-S"
}
],
"images": [
{
"id": 5566778899,
"src": "https://cdn.shopify.com/image.jpg"
}
]
}
Key Fields Merchants Use:
- id → Product ID
- title → Product title
- variants → Variant-specific details (price, SKU)
- images → URLs for product images
3. variants/update Example
{
"id": 9988776655,
"product_id": 1122334455,
"title": "Red / Small",
"price": "59.99",
"sku": "RED-S",
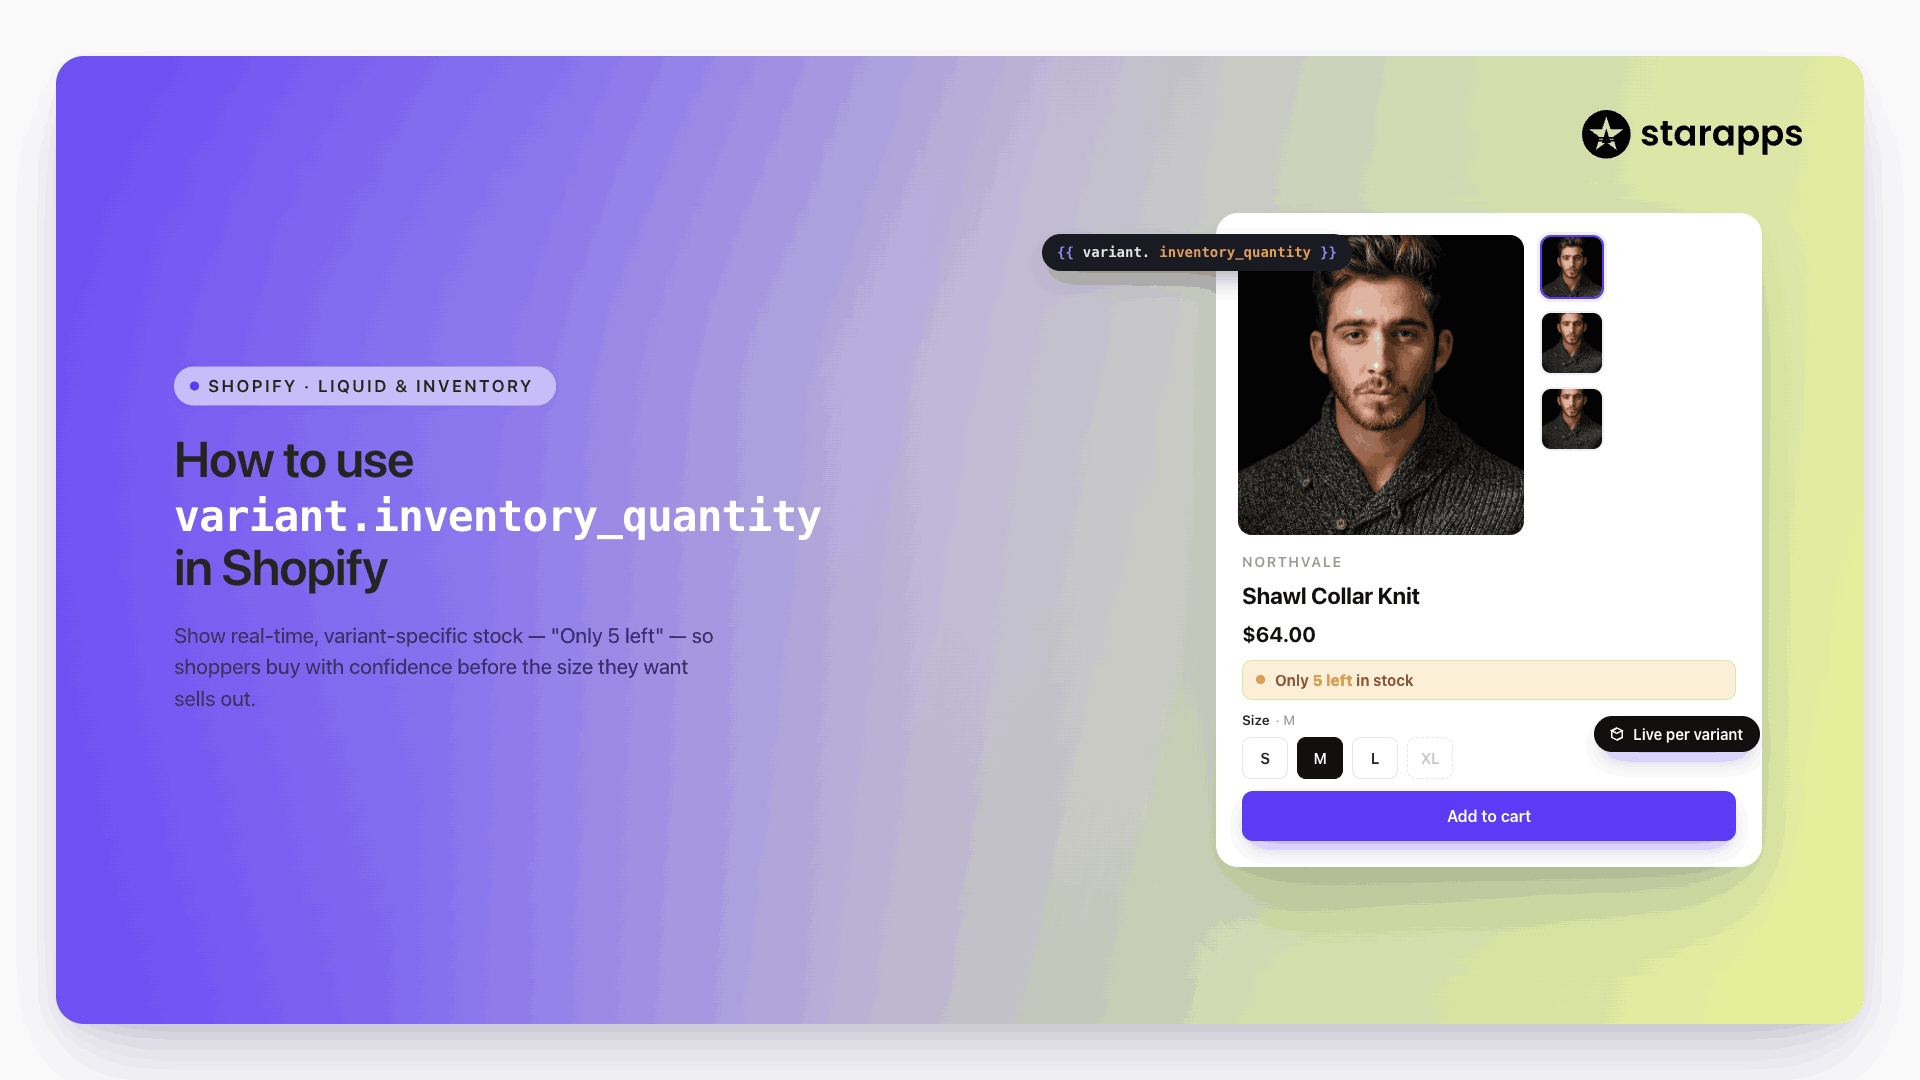
"inventory_quantity": 25,
"image_id": 5566778899
}
Key Fields Merchants Use:
- id → Variant ID
- product_id → Parent product ID
- price → Current variant price
- sku → Stock keeping unit
- inventory_quantity → Available stock
Stores using apps like Swatch King or Combined Listings often manage multiple variants per product with rich metadata. Webhook payloads for products/update and variants/update include this variant-level information, so understanding how to read these objects ensures custom integrations stay consistent with your merchandising setup.
Handle, Log & Troubleshoot Webhooks
Proper handling and logging of webhooks ensures your Shopify store automation runs smoothly, even when multiple events occur simultaneously. Without clear processes, missed updates or failed integrations can cause delays or data inconsistencies. The following practices help maintain reliability and make troubleshooting easier.|
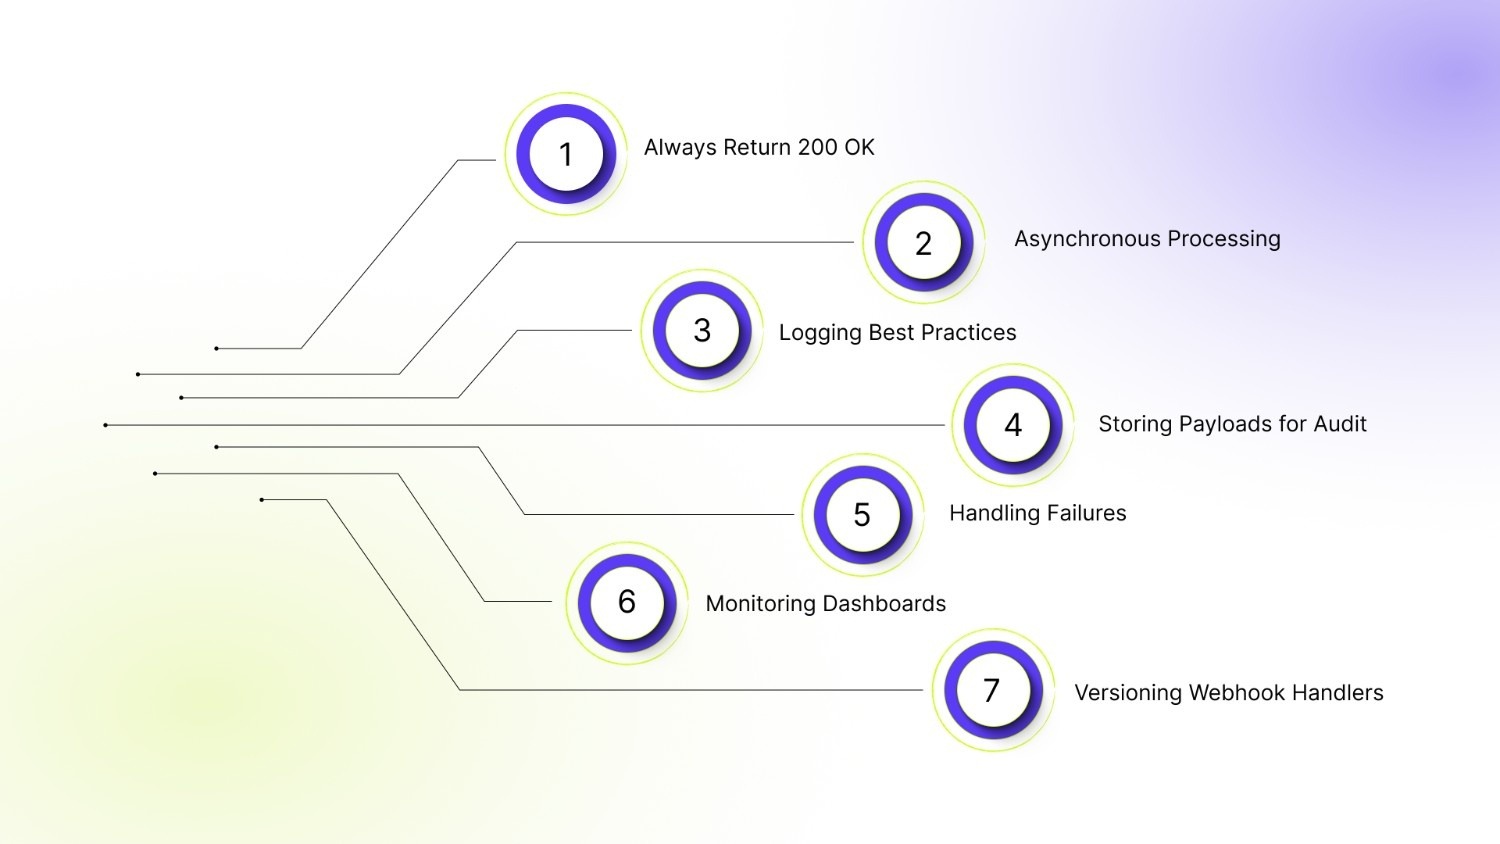
- Always Return 200 OK: Shopify marks a webhook as successfully delivered only when your endpoint responds with a 2xx status code. Any other response triggers retries and can eventually disable the webhook.
- Asynchronous Processing: Handle heavy tasks outside the main webhook handler. Respond to Shopify immediately, then process payloads in the background to prevent timeouts.
- Logging Best Practices: Record the event type, timestamp, and key identifiers like order ID, product ID, or variant ID. Separate error logs for failed events to make troubleshooting faster.
- Storing Payloads for Audit: Save raw or structured payloads in a database for later review, replaying events, or investigating failures.
- Handling Failures: Implement retry logic on your side, alert your team when repeated failures occur, and keep failed payloads accessible for manual processing.
- Monitoring Dashboards: Use dashboards to track delivery, failures, and processing times. Cloud monitoring tools like Grafana or Kibana help quickly spot bottlenecks.
- Versioning Webhook Handlers: When updating your webhook logic, maintain backward compatibility to avoid breaking existing integrations while introducing new functionality.
The final layer involves strengthening your webhook flow so it runs smoothly at higher volumes.
Also Read: How to Customize Shopify Product Pages for Better Sales.
Best Practices to Scale, Monitor & Integrate Shopify Webhooks
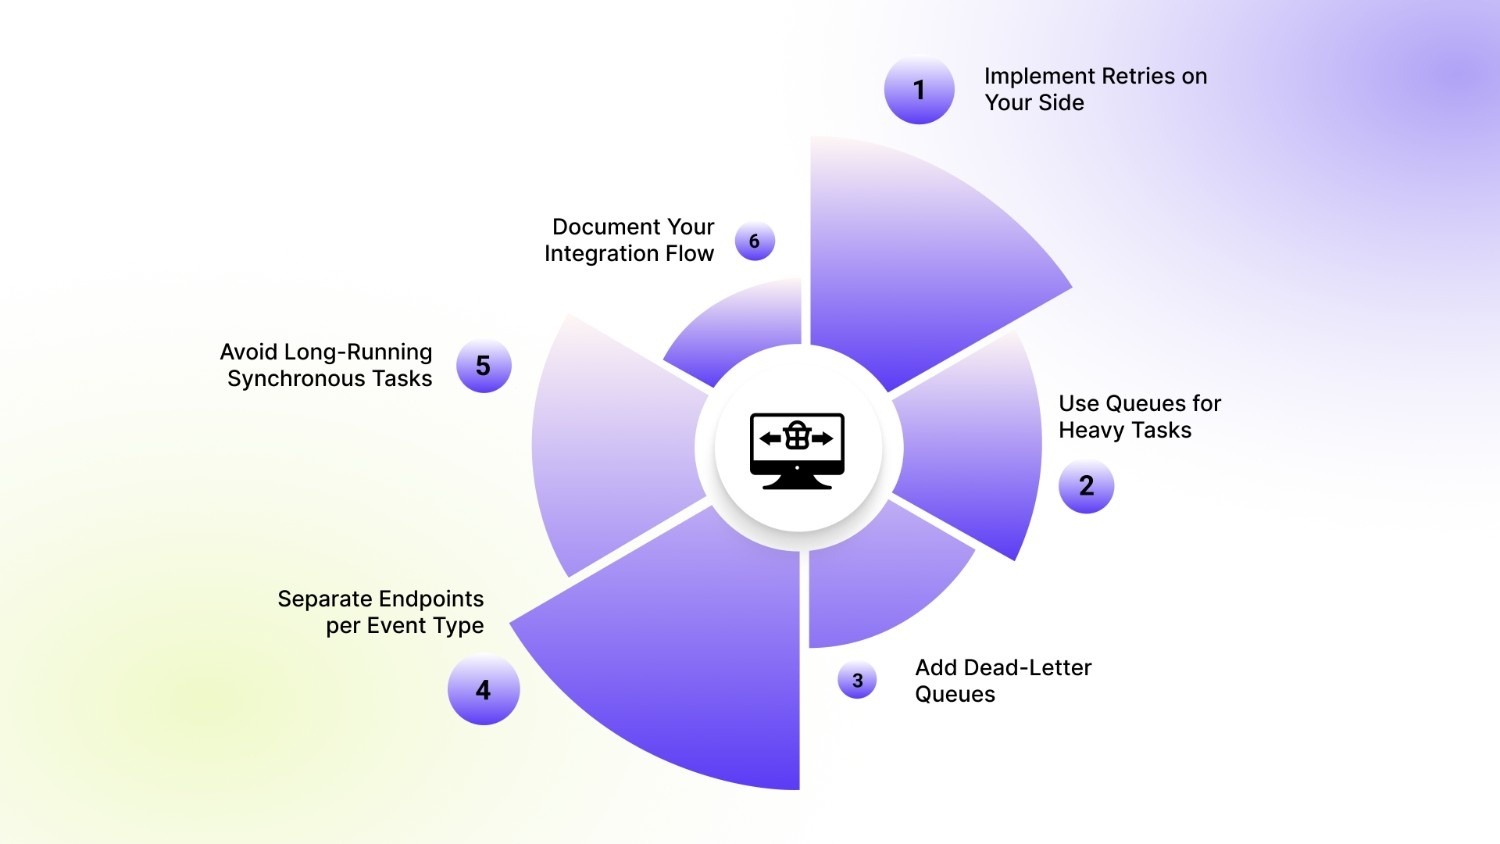
Scaling and monitoring webhooks ensure your store automation remains reliable as traffic and events grow. Following best practices reduces failures, improves processing speed, and keeps integrations maintainable.
- Implement Retries on Your Side: Even with Shopify’s retries, add your own retry logic for transient errors or temporary downtime.
- Use Queues for Heavy Tasks: Offload processing to background jobs with queues like SQS, Redis, or RabbitMQ to keep endpoints responsive.
- Add Dead-Letter Queues: Store failed payloads in a separate queue for review and manual handling.
- Separate Endpoints per Event Type: Organize webhooks by event to isolate failures and simplify debugging.
- Avoid Long-Running Synchronous Tasks: Respond to Shopify immediately and handle heavy operations asynchronously to prevent timeouts.
- Document Your Integration Flow: Keep a clear record of events, endpoints, and processing logic for easier maintenance and onboarding.
To put everything into context, here are practical ways merchants and developers use webhooks every day.
Practical Shopify Webhook Use Cases for Merchants & Developers
Shopify webhooks solve everyday problems for merchants and developers by keeping systems in sync and automating repetitive tasks.
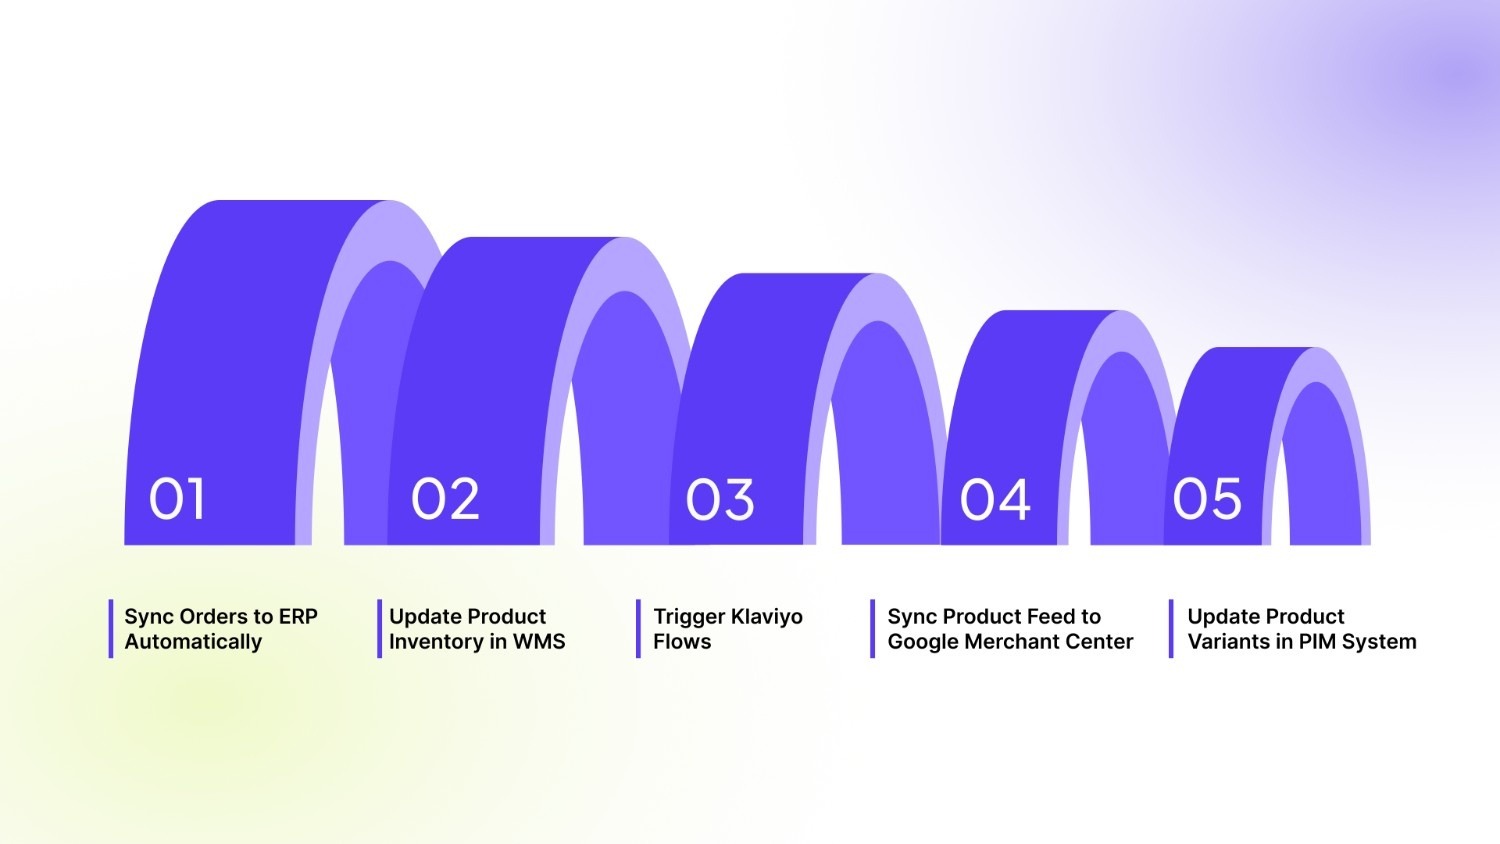
- Sync Orders to ERP Automatically: When a new order is placed, a webhook can send the data to your ERP instantly, reducing manual entry and ensuring accounting and inventory are always up to date.
- Update Product Inventory in WMS: Inventory changes can trigger updates in your warehouse management system, helping prevent stockouts or overselling.
- Trigger Klaviyo Flows: Customer events like account creation or order placement can automatically start personalized email or SMS campaigns.
- Sync Product Feed to Google Merchant Center: Product updates can push changes to Google Merchant feeds in real-time, keeping ads and listings accurate.
- Update Product Variants in PIM System: Changes to variant details, such as price, SKU, and images, can be synced to product information management systems for consistent data across platforms.
Each use case highlights how webhooks tie Shopify activity to the systems that keep your store running smoothly.
Final Thoughts
Shopify webhooks are the backbone of real-time automation—without them, critical updates can slip through the cracks, causing errors across orders, inventory, and product data. Merchants and developers should first ensure endpoints are secure, reliable, and capable of handling variant-level updates, then set up monitoring, logging, and retries to maintain smooth operations.
For stores managing complex product structures, tools from StarApps Studio simplify variant and image management while ensuring external integrations remain accurate. Implementing webhooks alongside these apps ensures your store runs efficiently and your systems stay in sync.
Connect with us to know how you can start optimizing your workflows today with StarApps.
FAQs
1. Can I receive Shopify webhooks on multiple endpoints for the same event?
Yes, Shopify allows you to create multiple webhooks for the same topic, each pointing to a different endpoint. This is useful if you want to trigger separate systems, such as an ERP and a marketing tool, simultaneously.
2. How do I test a webhook without affecting live data?
You can use Shopify’s Webhook Test Notification feature in the admin or tools like Postman to simulate incoming payloads. For local development, tunneling tools like ngrok allow safe testing.
3. Do webhooks work for draft orders or unpublished products?
Webhooks only trigger for actions on resources that exist in Shopify’s live store. Draft orders and unpublished products may not send events until they are finalized or published.
4. Can webhooks be delayed or queued by Shopify?
Shopify delivers events immediately, but if your endpoint is slow or unreachable, retries occur with exponential backoff. For high-volume stores, using a queue system on your server ensures reliable processing.
5. Are webhooks compatible with third-party apps?
Most apps that integrate with Shopify can consume webhook data. Webhooks can feed external CRMs, ERPs, PIMs, fulfillment tools, and even marketing platforms, enabling automated workflows across systems.
Heading

End-to-end traceability
To ensure regulatory compliance, you must have a complete overview of your products from production to shipping. Book a demo to see how Katana can give you full visibility of your operations.

.png)
.png)