

Learn how to complete the Shopify signup in 7 quick steps. Set up your store, optimize it for success, and start selling fast with this 2025 guide.
Global ecommerce sales are projected to climb to nearly $8.1 trillion by 2026, reflecting the rapid shift of businesses and consumers toward digital storefronts worldwide. With more people shopping online than ever, having your own store is an opportunity waiting to be seized.
If you’re ready to turn your business idea into reality, completing your Shopify signup is the first step. Shopify provides everything you need to start selling, without complicated setups or technical hurdles.
This guide walks you through the process of creating your Shopify account, outlines the necessary details to prepare beforehand, and guides you smoothly from sign-up to selling. It’s designed to help you start strong and build with confidence.
Key Takeaways
- Shopify signup takes only a few minutes, letting you launch your store quickly without needing a business license or technical skills.
- Preparing details such as your store name, email, and business goals ensures a smooth registration and a faster setup.
- After signing up, customizing your theme, adding products, and setting up payments and shipping, turn your store into a functional business.
- Testing checkout, fixing common signup issues, and optimizing pages help create a reliable and conversion-ready store.
- Using third-party tools simplifies optimization by automating product images, alt text, and variant details, helping new merchants scale efficiently.
Why Sign Up with Shopify?
Starting an online store can feel like a big leap. Between managing inventory, payments, and design, the setup can easily become overwhelming. Shopify streamlines this process by providing a ready-to-use foundation that supports your business from launch to growth.
Why signing up with Shopify makes sense:
- Unified management: Oversee products, inventory, payments, shipping, and marketing from one dashboard.
- Built-in scalability: Easily transition between plans as your business grows, without losing data or functionality.
- Professional templates: Access hundreds of responsive, high-quality themes that create instant credibility.
- Secure payment options: Accept major credit cards, digital wallets, and local payment methods without extra integrations.
- Continuous support: Access live chat, phone help, community forums, and detailed guides at any time.
- Extensive app marketplace: Extend functionality with thousands of tools for marketing, analytics, fulfillment, and customer engagement.
Shopify supports entrepreneurs in over 175 countries and facilitates billions of transactions annually. By signing up, you align your business with a trusted e-commerce infrastructure that helps turn ideas into sustainable ventures.
What You Need Before Signing Up?
Preparation helps you move smoothly through Shopify’s signup process. While creating an account takes only a few minutes, being prepared with the right details saves time and enables you to make more informed setup decisions.
Here are the things you must have before signing up:
- Valid email address: Use a professional email address that you check regularly. Shopify will send essential notifications, updates, and billing details to this address.
- Business or store name: Have at least one name idea ready. Your first choice becomes your default myshopify.com URL, so choose something short, clear, and easy to remember.
- Basic business information: Know your region, business type, and what you plan to sell: physical products, digital items, or services.
- Clear business goals: Decide whether to launch immediately or explore during your trial. This helps you focus your setup.
- A few minutes of uninterrupted time: Though signup is fast, take your time to review each step to avoid missing essential options.
You must be at least 18 years old (or the age of majority in your country) to create an account, since it involves legal and financial agreements. Getting these essentials ready ensures your signup goes smoothly and sets you up for a confident start on Shopify.
How to Sign Up on Shopify (Step-by-Step)
The Shopify signup process is designed to get you from visitor to store owner in under five minutes. Let’s look at each step in detail:
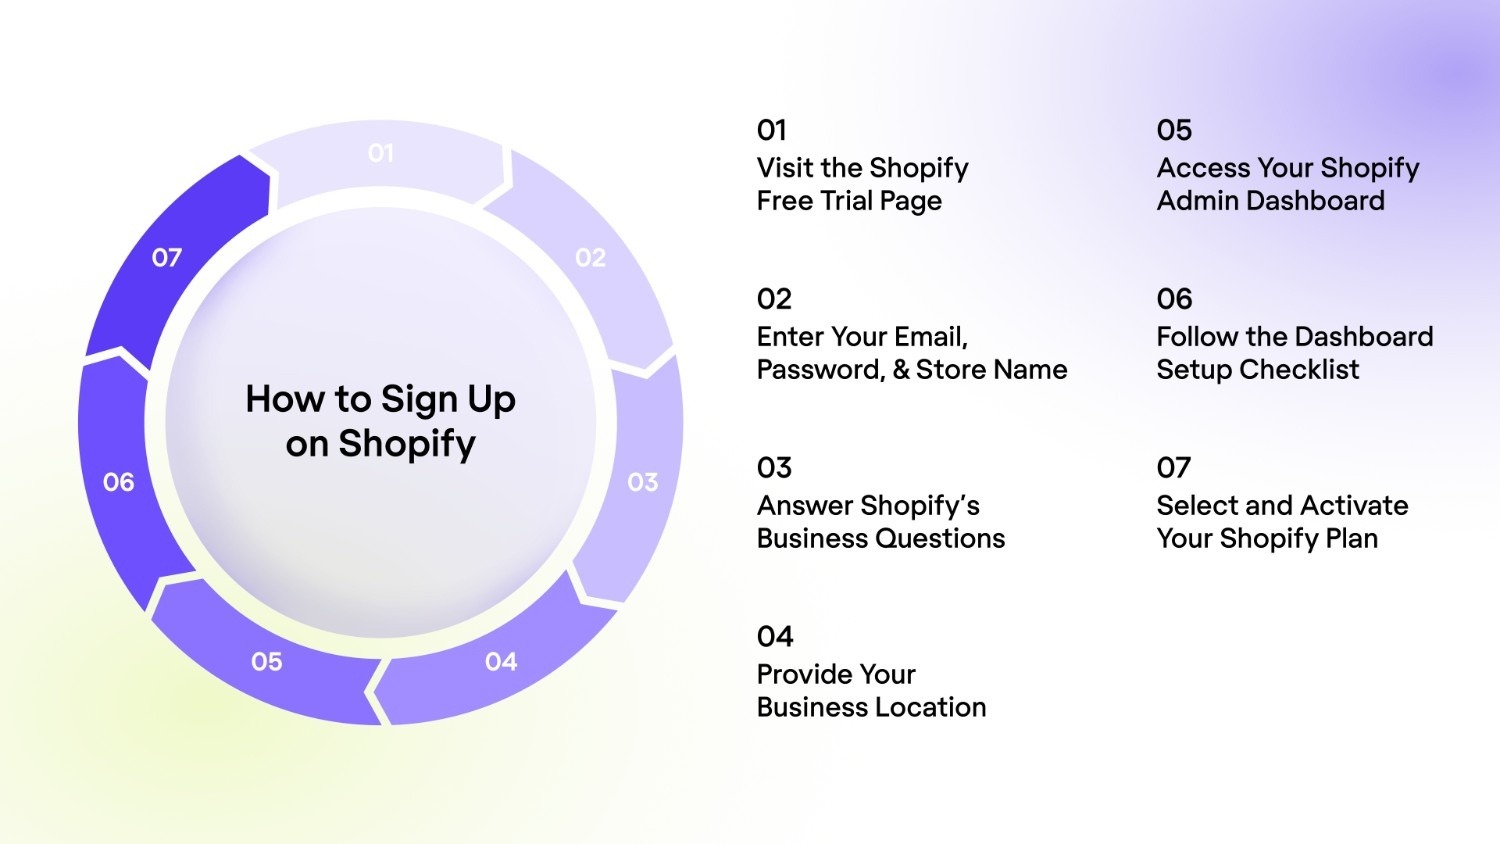
Step 1: Visit the Shopify Free Trial Page
- Go to shopify.com on your computer or mobile browser.
- On the homepage, find and click the “Start free trial” button near the top or center of the page.
- Shopify currently offers a 3-day free trial, followed by a $1 monthly fee for the first three months.
- No credit card is needed to begin your trial. You’ll add payment details only when you choose a plan.
- A new page will open with a simple sign-up form that asks for your email address, store name, and password.
Step 2: Enter Your Email, Password, and Store Name
- Email Address: Enter an active, professional email address that you check regularly. This is where Shopify sends security alerts, billing updates, and order notifications.
- Password: Create a strong password using uppercase, lowercase, numbers, and symbols. Example: Shopify#2025Start.
- Store Name:
- Choose a short, memorable name. It becomes your default Shopify domain (for example: storename.myshopify.com).
- If your name is taken, Shopify shows a red warning and suggests alternatives.
- You can change or replace this later by purchasing a custom domain, such as yourstore.com.
- Click “Create your store” to continue.
Step 3: Answer Shopify’s Business Questions
- After clicking “Create your store”, a short setup form appears to personalize your dashboard.
- It asks questions such as:
- Are you already selling products? (Select “I’m just playing around” if you’re exploring.)
- What do you plan to sell? (Physical products, digital goods, or services.)
- What is your estimated revenue? (Select a range or “Not sure yet.”)
- Where will you sell? (Online store, social media, marketplace, etc.)
- You can also click “Skip all” if you want to proceed more quickly.
Step 4: Provide Your Business Location
- Enter your business address. If you work from home, you can use your home address as your mailing address.
- Complete every field:
- Country
- Street address
- City
- State or province
- ZIP or postal code
- Double-check spelling to avoid payment setup issues later.
Example: If you select the United States, your default currency will be USD, and you can use Shopify Payments. Other countries may have different currencies and payment options.
Step 5: Access Your Shopify Admin Dashboard
- Once you submit your location, Shopify automatically creates your account.
- You’ll be redirected to your Shopify admin dashboard, which serves as your primary control center.
- A 3-day free trial countdown appears at the top, indicating the remaining time.
- From here, you can:
- Add your first product.
- Customize your theme.
- Connect payment and shipping methods.
- Update your store name, logo, and policies to ensure consistency across all platforms.
Step 6: Follow the Dashboard Setup Checklist
- On your dashboard, find the setup guide with checkboxes.
- Work through each task step by step:
- Add your first product.
- Customize your online store.
- Add a custom domain.
- Set up payments.
- Configure shipping and taxes
- Each task includes direct links that open the right section automatically.
Step 7: Select and Activate Your Shopify Plan
- When ready to start selling, click “Select a plan” on your dashboard.
- Review Shopify’s main plan options:
- Basic Shopify ($39/month): Great for new sellers. Unlimited products and two staff accounts.
- Shopify ($105/month): Adds professional reports, five staff accounts, and lower fees.
- Advanced Shopify ($399/month): Includes advanced reports, 15 staff accounts, and the lowest transaction fees.
- Shopify Plus (custom pricing): For large, high-volume businesses.
- Select the plan that best suits your needs. You can upgrade or downgrade anytime.
- Enter your payment method. Shopify accepts all major credit cards securely.
- Once payment is confirmed, your store becomes fully active and ready for launch.
Cost Notes:
- Shopify does not charge extra transaction fees if you use Shopify Payments.
- Standard card fees still apply, starting at 2.9% + 30¢ per transaction on the Basic plan.
- If you use third-party gateways like PayPal, Shopify adds a fee of 0.5%–2%, depending on your plan.
Those are the seven steps to create your Shopify account. However, before you dive in, let's review some tips that'll make the process even smoother.
What Happens After Shopify Signup?
You've created your account and are now viewing your dashboard. Now what? The post-signup phase is about turning your empty store into a fully functional business that's ready to accept orders.
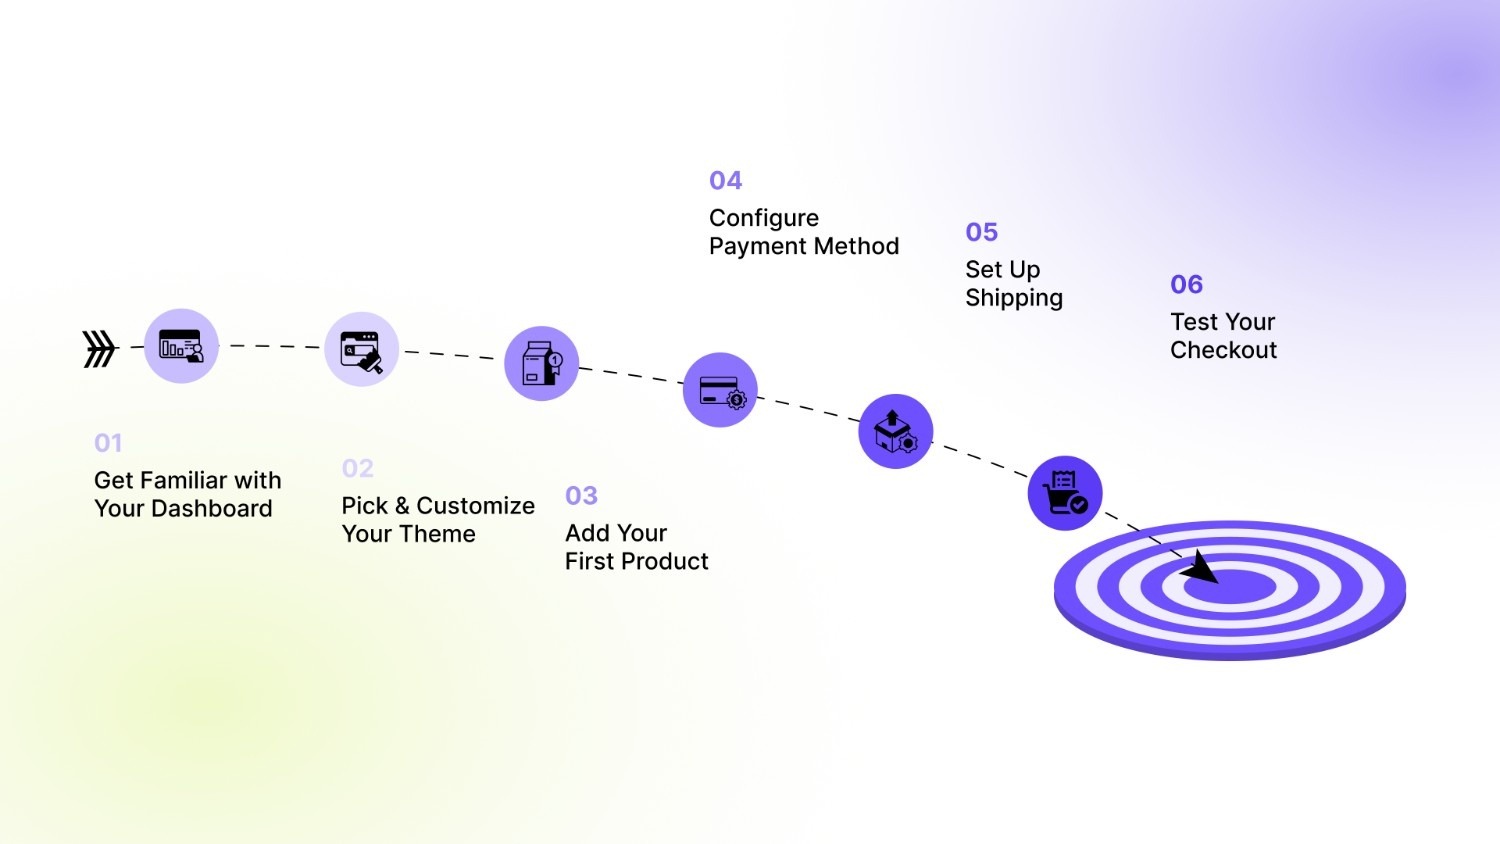
Get Familiar with Your Dashboard
Your Shopify admin is where you'll spend most of your time managing your business. Understanding the layout now saves you frustration later.
The left sidebar organizes everything into sections:
- Home – Your overview and setup progress.
- Orders – Manage customer purchases.
- Products – Add and organize what you sell.
- Customers – Track buyer information.
- Analytics – See sales data and trends.
- Marketing – Run campaigns and promotions.
- Online Store – Customize design and pages.
- Settings – Configure everything else.
Click through each section to see what's available.
Pick and Customize Your Theme
Your store's design has a significant impact on whether customers trust you enough to make a purchase. A professional-looking store converts better than a generic one.
Go to Online Store → Themes to browse designs. Shopify offers free themes that look professional and work great for new stores. You don't need to buy a premium theme right away.
Preview different options to see how they display your content. Think about your industry when choosing:
- Fashion stores need strong image displays.
- Tech products benefit from detailed specification sections.
- Service businesses need clear contact forms.
Click "Customize" on your chosen theme to open the editor. This drag-and-drop interface allows you to change colors, fonts, and layout sections without requiring any code. Add your logo, update your homepage sections, and adjust navigation menus to match your brand.
Test your design on mobile devices. Most customers shop on their phones, so your store needs to look good and work smoothly on smaller screens.
With your design in place, it's time to add what you're actually selling.
Add Your First Product
Go to Products → Add product to create your first listing. This is where you inform customers about what you're selling and why they should purchase it.
Each product needs specific information:
- Title – Use clear, descriptive names with relevant keywords customers might search for. "Women's Running Shoes" works better than "Product 1."
- Description – Write detailed information about features, benefits, materials, dimensions, and what makes this product special. Good descriptions reduce customer questions and increase sales by answering objections before they happen.
- Images – Upload high-quality photos from multiple angles. Show the product in use, not just on a white background. Customers want to see scale, texture, and how the product looks in real life.
- Pricing – Set your price, compare-at-price (if you're showing a discount), and cost per item (for tracking your internal profit).
- Inventory – Turn on inventory tracking to prevent overselling. Add SKUs if you manage multiple products or use external inventory systems.
- Variants – If your product comes in different sizes, colors, or styles, set those up as variants instead of creating separate products for each one.
- Collections – Group similar products into collections, such as "Summer Collection" or "Best Sellers." This helps customers navigate your store and easily find related items.
Take your time with this first product. The quality of your product pages directly impacts your conversion rate. Suppose you need help automating these tasks. In that case, StarApps Studio offers tools to help you create variant images, alt text, product titles, and descriptions so that you can spend more time on products and customers.
After adding products, you need to set up how you'll actually get paid.
Configure Payment Methods
- Go to Settings → Payments to set up how you'll accept money from customers. This is a crucial step; without it, you can't sell anything until payment processing is configured.
Shopify Payments is the easiest option if it's available in your country. It accepts all major credit cards, as well as Apple Pay, Google Pay, and Shop Pay. Funds go straight to your bank account with no extra transaction fees beyond the standard credit card processing rates.
To activate Shopify Payments, you'll need:
- Your business information
- Bank account details for deposits
- Social security number or tax ID
The setup takes just a few minutes, and you can start accepting payments immediately.
Third-party gateways, such as PayPal, Stripe, or Authorize.net, also work if Shopify Payments isn't available in your region. Just remember that using these adds extra transaction fees on top of the payment processor's fees, which cuts into your profit margins.
With payment processing configured, you need to figure out how you'll ship products to customers.
Set Up Shipping
- Go to Settings → Shipping and delivery to create shipping zones and rates. This tells Shopify how much to charge customers for shipping based on their location.
Define zones by country, state, or region. Then set shipping rates for each zone using one of these methods:
- Flat rate – Same price regardless of order size
- Price-based – Rates change based on order total.
- Weight-based – Cost depends on package weight.
One strategy that works well: offer free shipping on orders over a certain amount (like $50). This encourages customers to add more items to reach the threshold, thereby increasing your average order value. Shopify makes it easy to set up these conditional shipping offers.
Don't forget about taxes. Go to Settings → Taxes and duties to configure tax collection based on your location and legal requirements. US stores get automatic tax calculation for domestic sales, which saves you from doing math manually.
You're almost ready to go live, but there's one more critical step: testing everything.
Test Your Checkout
Before launching publicly, place a test order to see what your customers will experience. Shopify offers test payment options that simulate transactions without incurring actual charges.
Walk through the whole process as if you're a customer:
- Browse products.
- Add items to the cart.
- Go to checkout.
- Enter shipping information.
- Select shipping method.
- Complete payment.
Check that confirmation emails are sent correctly and contain all necessary information. Verify that order details appear accurately in your admin dashboard. Look for anything confusing, broken, or unclear, which might cause customers to abandon their purchase.
Pay special attention to mobile checkout. Over 69% of Shopify orders occur on mobile devices, so your checkout must function flawlessly on phones and tablets. Test on multiple devices and browsers if possible.
Identifying and resolving issues promptly prevents future lost sales and customer frustration.
Even with careful setup, you may encounter a few bumps along the way. Let's cover the most common ones.
Common Shopify Signup Issues and Fixes
Most signups go smoothly, but occasionally you'll hit a snag. Knowing how to troubleshoot common problems gets you back on track quickly.
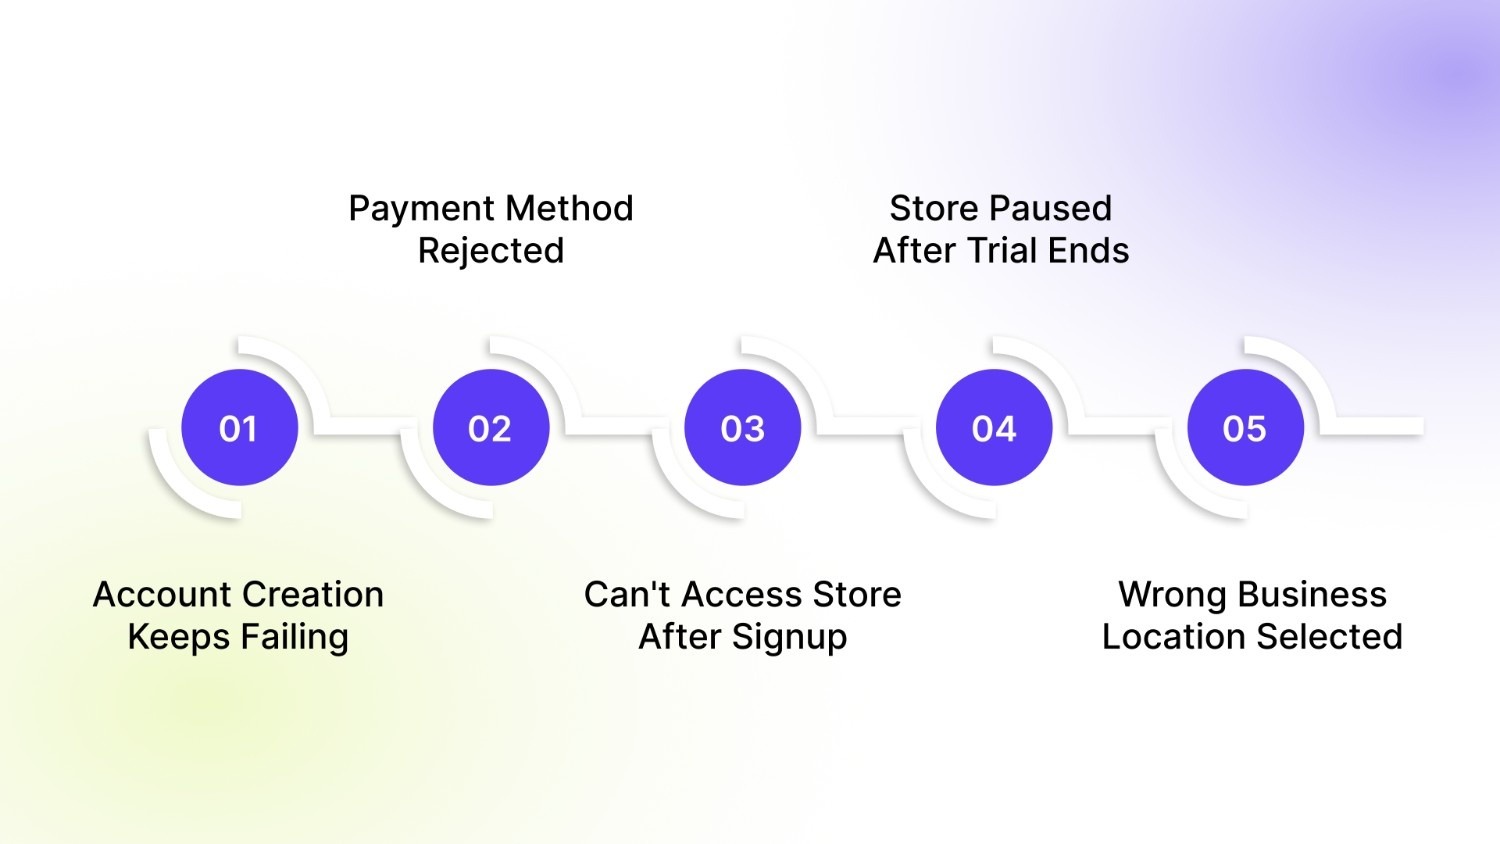
Account Creation Keeps Failing
Your signup attempts fail with error messages or no explanation. This frustrating situation can result from several underlying causes.
How to fix it:
- Clear your browser cache and cookies, then restart your browser.
- Try a different browser entirely.
- Temporarily disable VPN or proxy services (Shopify's fraud detection may flag these).
- Ensure you're using a valid email address that hasn't been used for Shopify before.
- Contact Shopify support if technical issues persist.
Payment Method Rejected
When selecting your paid plan after the trial, your credit card gets declined despite having sufficient funds. This blocks you from launching publicly.
How to fix it:
- Verify your billing address matches your bank's records exactly.
- Check that your card hasn't expired and that you entered the CVV correctly.
- Contact your bank if the problem persists.
- Try an alternative payment method.
- Use PayPal if credit card payments consistently fail.
Can't Access Store After Signup
After creating your account, you may encounter errors when attempting to access your admin dashboard, or the page may not load.
How to fix it:
- Use the correct admin URL: yourstore.myshopify.com/admin.
- Clear browser cache and cookies before trying again.
- Try an incognito or private browsing window.
- Check your internet connection.
- Disable browser extensions temporarily (especially ad blockers).
- Wait a few minutes and try again, as Shopify occasionally experiences brief maintenance periods.
Store Paused After Trial Ends
Your 3-day trial expired without selecting a plan, so Shopify paused your store. The storefront is inaccessible, and you can't log in to the admin.
How to fix it:
- Select a paid plan to reactivate immediately.
- Use the $1 for three months offer if you need more time to build your business.
- Contact support if you need help accessing a paused store.
Wrong Business Location Selected
You accidentally picked the wrong country during signup. Now your currency and payment options don't match your actual location.
How to fix it:
- Contact Shopify support immediately with your correct address.
- Provide any documentation they request to verify your location.
- Understand that this may require reconfiguring taxes and payments.
- For severe mismatches, support might recommend creating a new account.
These are the most common issues new merchants face. Once you're past setup, the focus shifts to making your store stand out.
How to Optimize Your Store After Signup?
Once you complete your Shopify signup, your store is live, but that’s only the starting point. To make your store look professional, convert more visitors, and cut down manual work, you need to optimize it. This is where tools from StarApps Studio can really make a difference.
They build practical, beginner-friendly Shopify apps that handle key setup and optimization tasks for business owners who want a smooth, scalable store without hiring a developer. StarApps Studio’s suite of tools covers everything from managing product variants to improving visuals and SEO.
Here is how StarApps Studio can help you make your store ready for customers.
Variant Image Automator
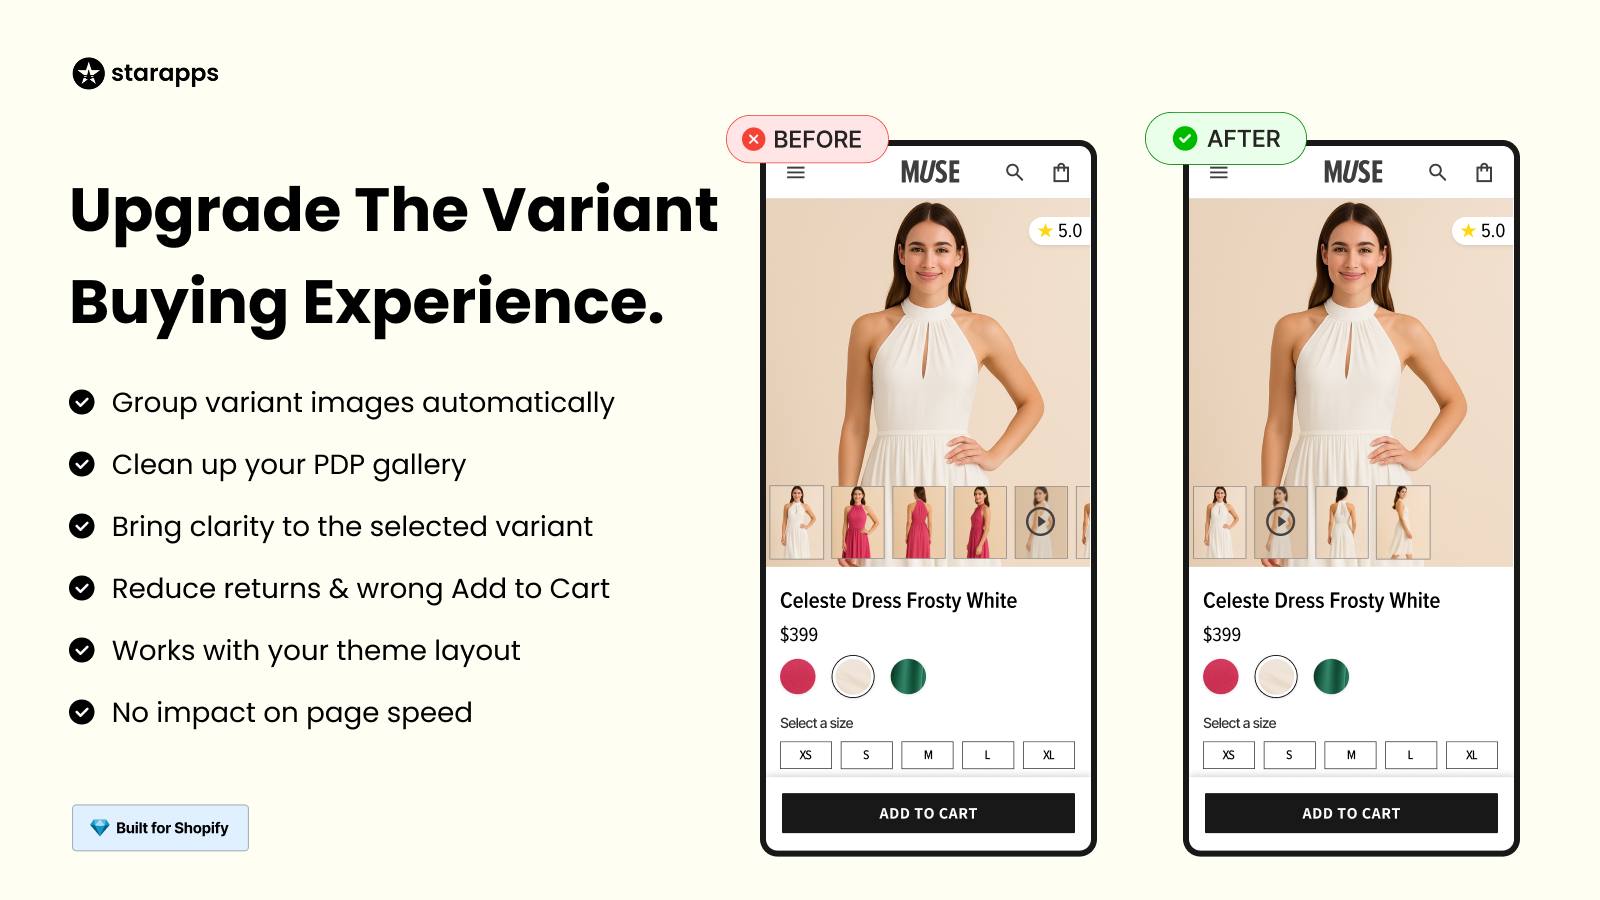
Managing product images can quickly become complicated when you have multiple colors or sizes. Customers often view all product photos at once, which can appear cluttered and confusing.
Variant Image Automator organizes images automatically, allowing shoppers to see only what matches their selection.
- Shows the correct images when a customer picks a color, size, or style.
- Removes the need to tag manually or group product images.
- Supports multiple images per variant for better visuals.
- Keeps your store fast and responsive.
- Reduces wrong orders caused by unclear product photos.
This app helps beginners save time and makes every product page look clean and professional.
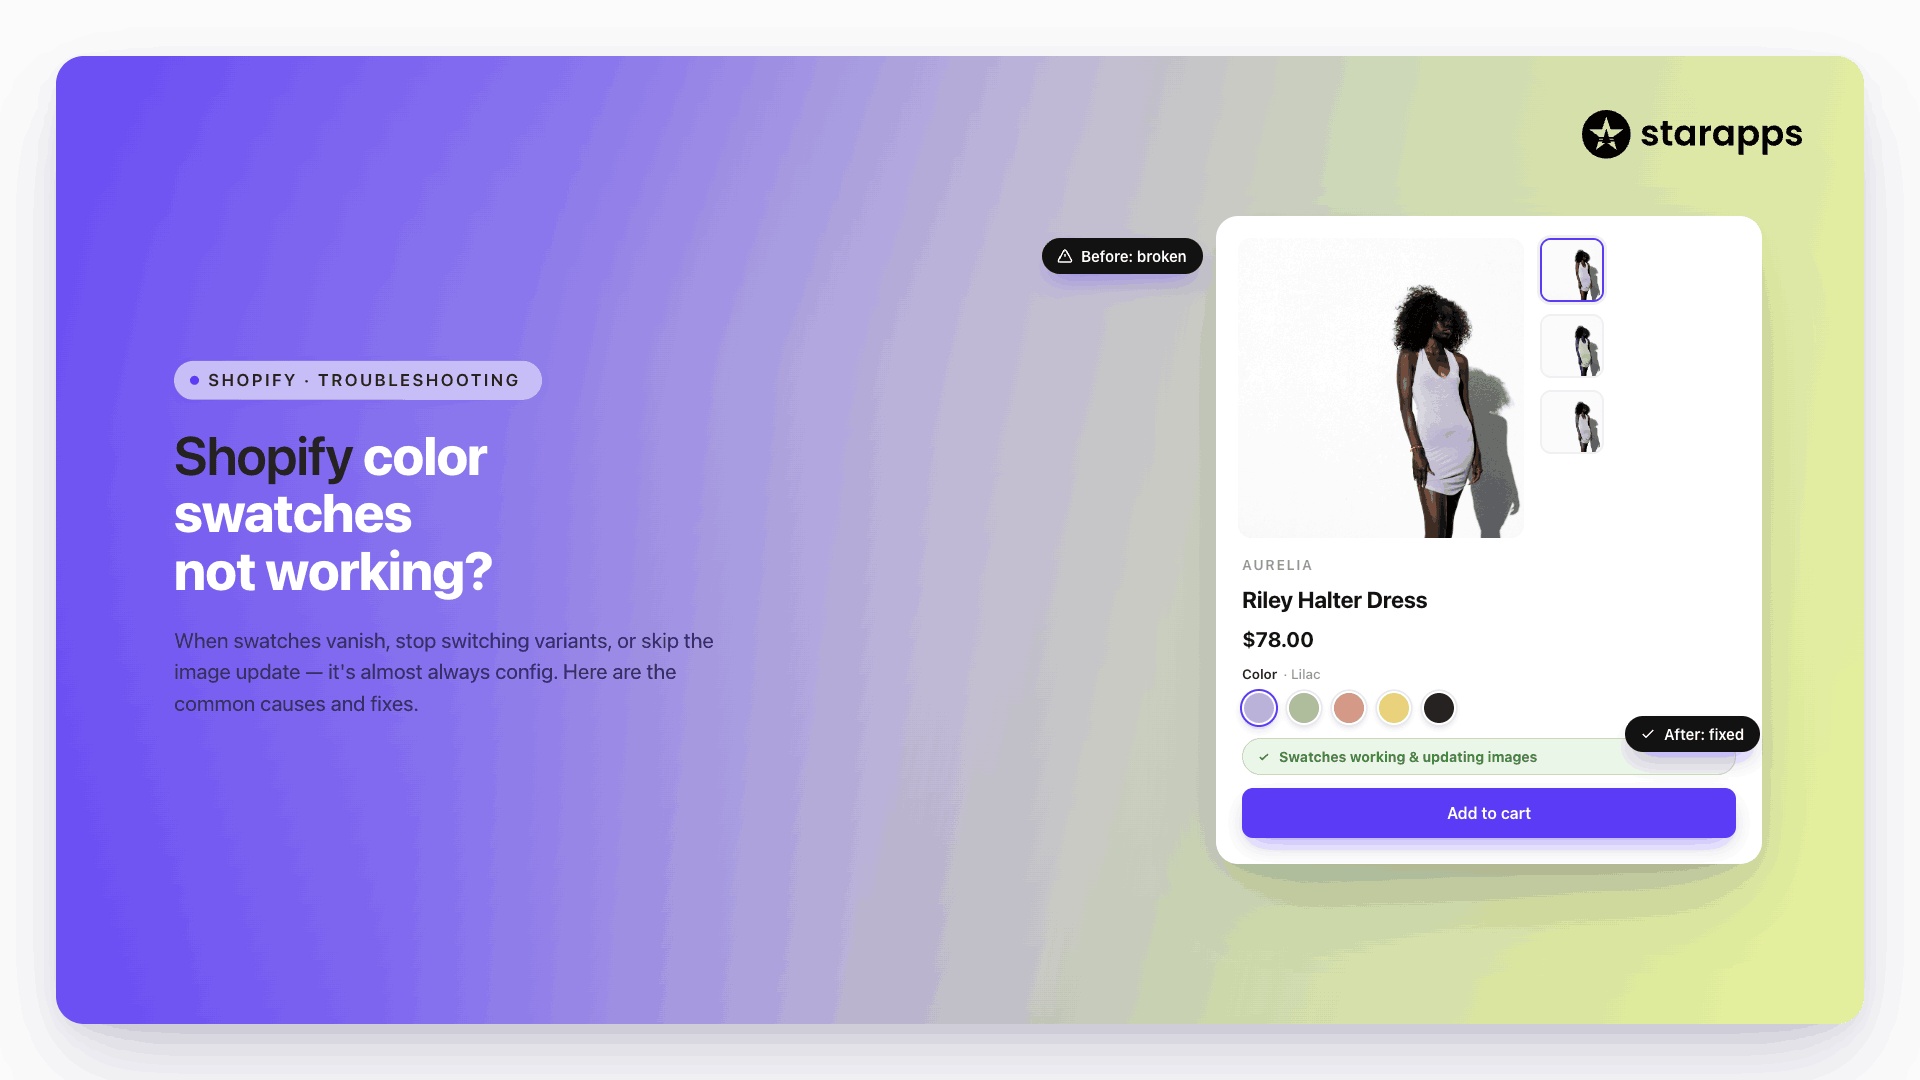
Color Swatch King
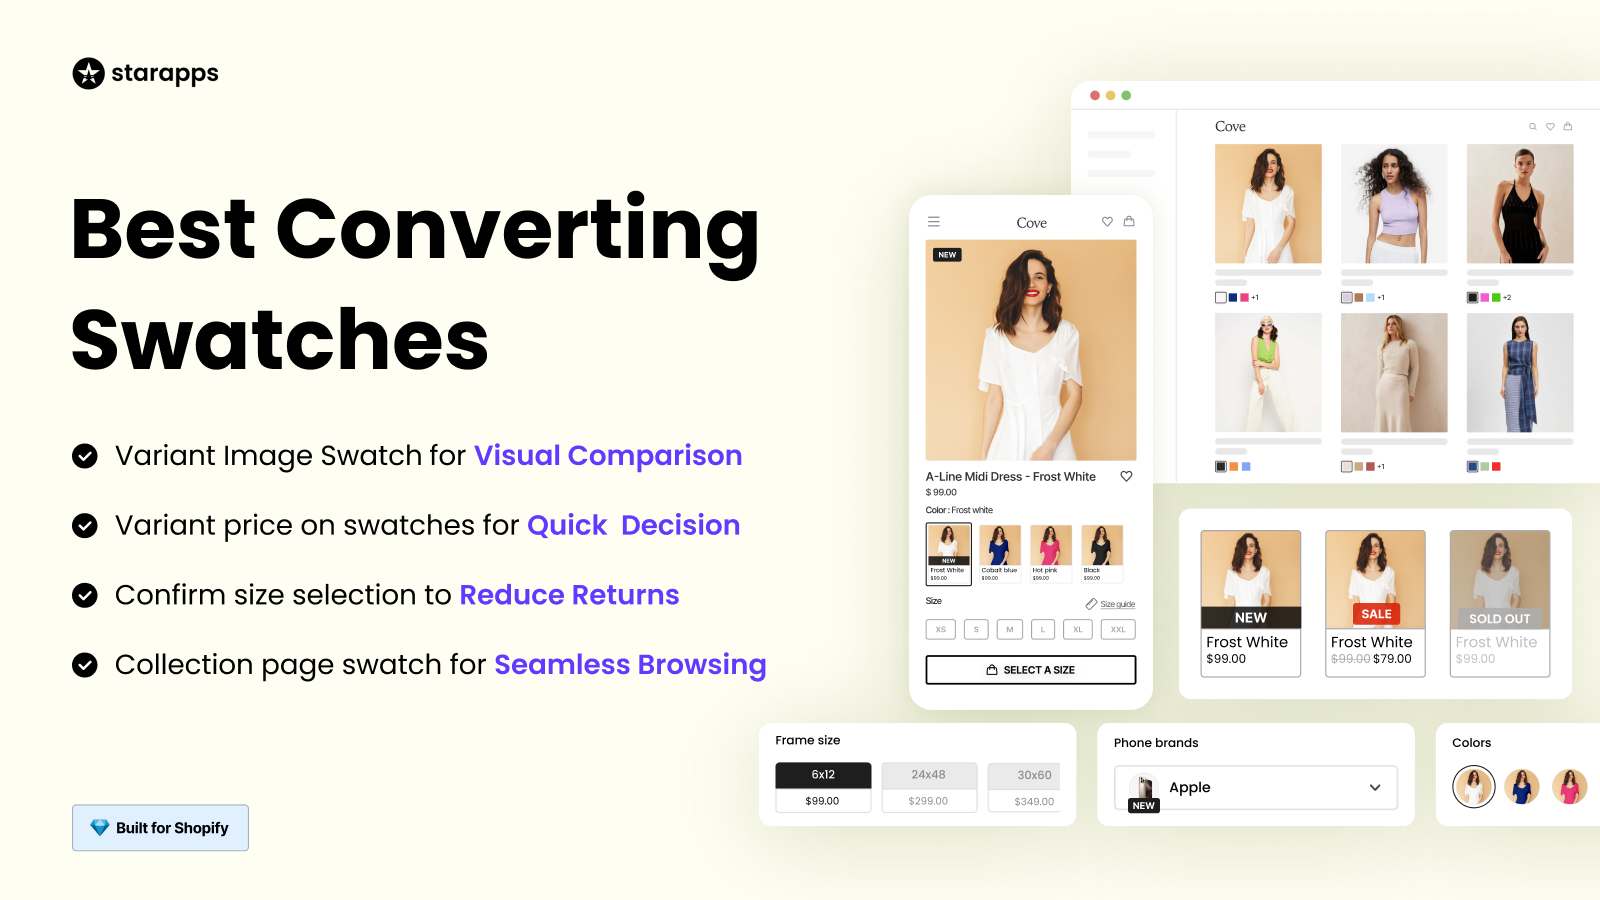
Shopify’s basic dropdowns can hide color and style choices behind extra clicks. Shoppers want to see their options right away before making a decision.
Swatch King transforms plain dropdowns into colorful, visual swatches.
- Displays colors, patterns, and images directly on product pages.
- Let shoppers preview options from collection pages.
- Allows bulk uploads for extensive inventories.
- Offers custom swatch shapes to match your store’s design.
- Helps customers choose faster and with more confidence.
It gives your store a polished, modern look that feels professional, even if you are just starting.
Variant Alt Text King
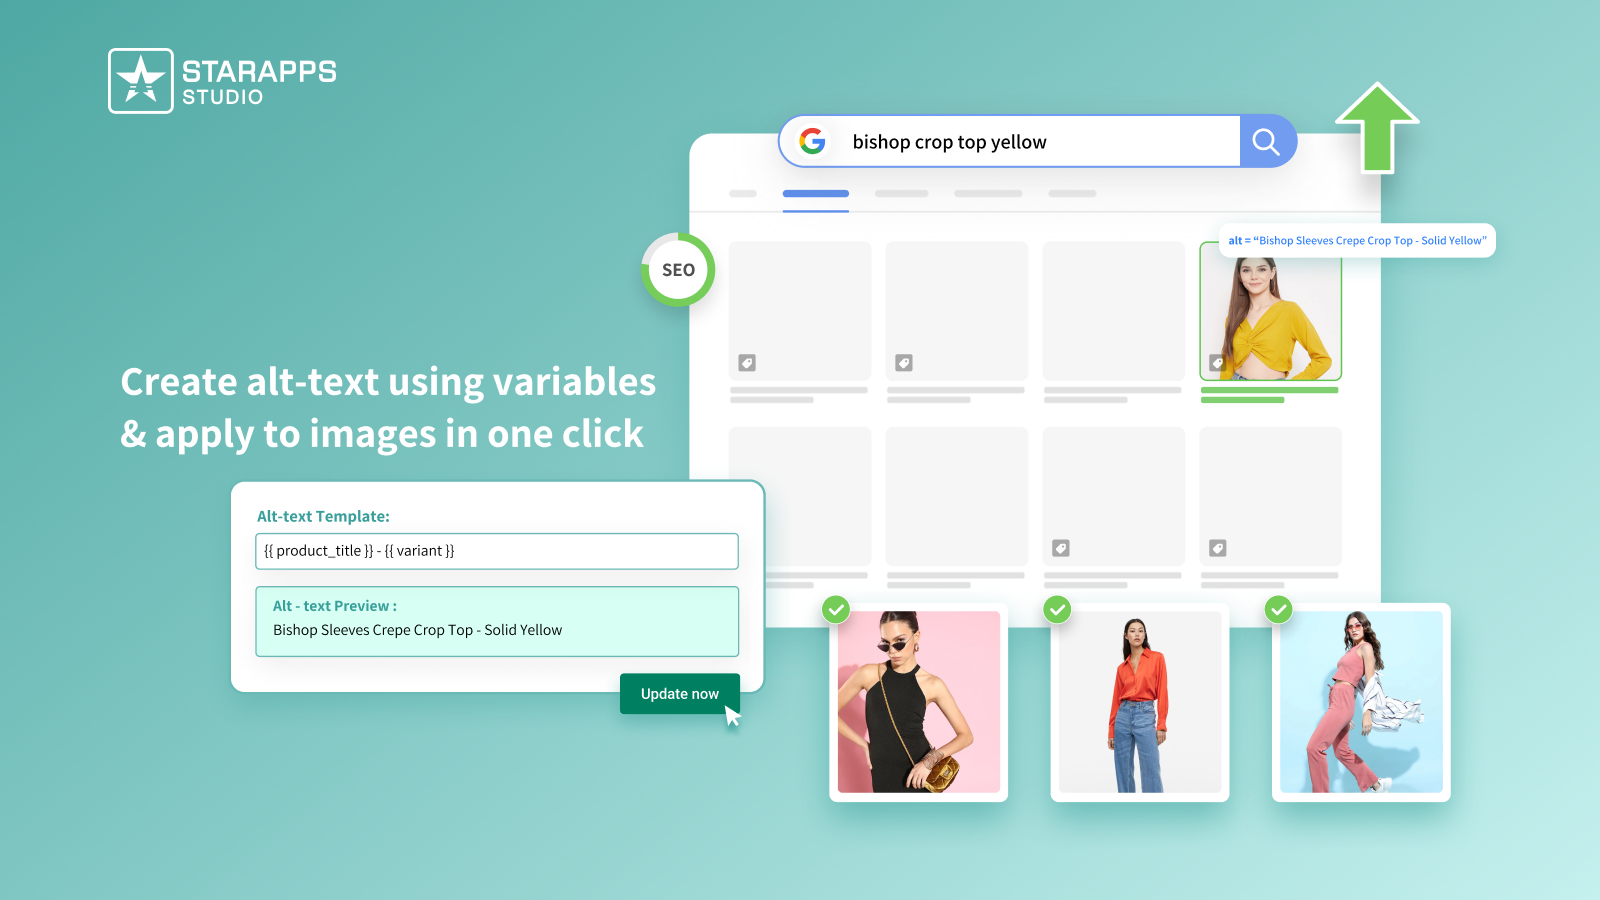
Optimizing images for search engines and accessibility is often overlooked by new merchants, but it plays a significant role in how your store performs online.
Variant Alt Text King automates your image alt text so you do not have to do it manually.
- Generates descriptive alt text for every product and variant.
- Updates automatically when you add new products.
- Improves visibility in image search results.
- Helps your store stay compliant with accessibility guidelines.
- Works seamlessly with Variant Image Automator for complete image optimization.
This is one of the simplest ways to establish SEO strength and accessibility from the outset.
SA Variants: Combined Listings

By default, Shopify shows each product as a single listing on collection pages. That means if you sell a shirt in five colors, shoppers only see one version unless they click through.
SA Variants: Combined Listings increase visibility for every variant.
- Displays each color or style as its own listing on collection pages.
- Creates individual URLs so each variant can rank in search results.
- Improves product discovery with better filtering.
- Makes your catalog look fuller and more organized.
- Increases the chances of customers finding the product they want.
For small business owners, this can mean increased visibility and more sales opportunities without requiring additional products or services.
Variant Descriptions King
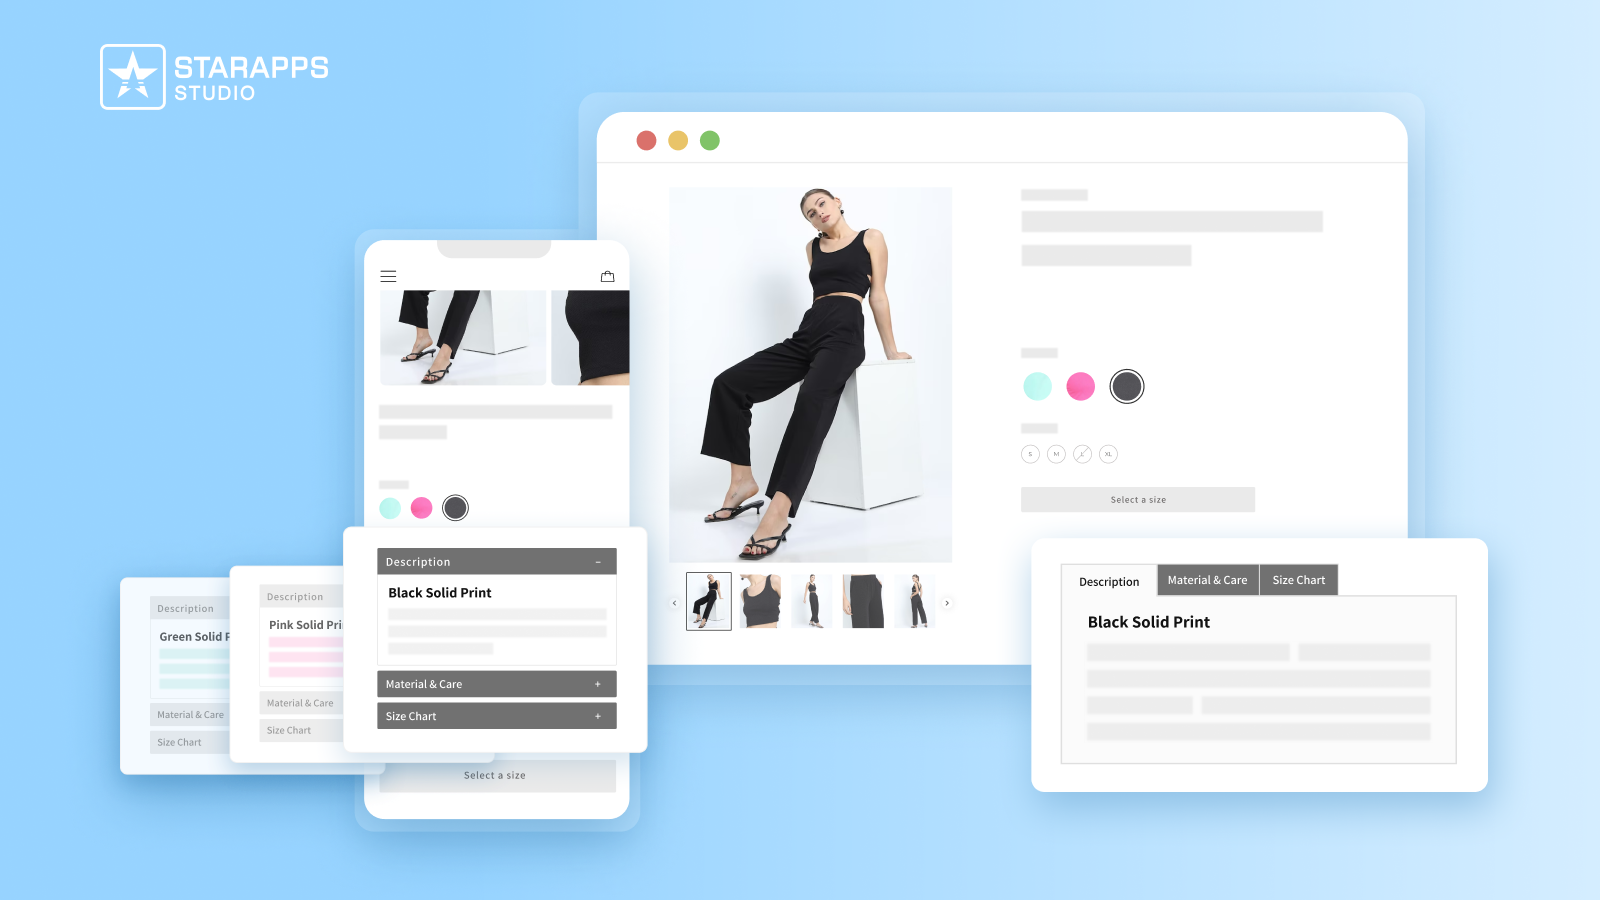
When your products have different materials, fits, or specifications, showing all that information together can overwhelm customers.
Variant Descriptions King helps you show the correct details at the right time.
- Displays variant-specific descriptions only when selected.
- Organizes content into clean tabs or accordions.
- Adjusts automatically for mobile layouts.
- Reduces customer questions by providing clear information.
- Builds trust by showing shoppers exactly what applies to their choice.
It helps keep product pages tidy and informative, which improves the overall shopping experience.
StarApps Studio tools enhance visuals, streamline management, boost SEO, and help your store appear professional from the outset. Once your store is optimized, you will be ready to focus on attracting visitors and increasing sales.
Final Thoughts!
Signing up for Shopify is quick, but making the store work for you takes focused effort. Use the steps you learned in this guide to complete your Shopify signup, set up product pages, and test checkout so that you can launch with confidence. Small, consistent improvements to product information and images yield significant benefits in reduced returns and higher conversion rates.
If managing variants, image SEO, and precise product copy feels like too much for you to handle on your own, use StarApps Studio to automate these tasks. Their apps handle variant images, generate descriptive alt text, and let you display variant-specific titles and descriptions, saving time and helping customers find and buy the correct item.
Treat optimization as part of your launch plan. Better product pages mean clearer choices for shoppers and less time spent fixing mistakes later. Focus on the basics first, then layer in automations that free you to promote and grow the store.
Ready to move from setup to sales? Try StarApps Studio to streamline your product pages or get in touch to see how they can help your store scale.
FAQ’s
1. Can you sign up for Shopify for free?
Yes, Shopify offers a 3-day free trial with full access to its tools. You can explore features, design your store, and add products before choosing a paid plan.
2. What is Shopify $1 for 3 months?
Shopify’s $1 for 3 months offer lets new users continue building their store after the free trial. You pay only $1 per month for the first three months, after which standard pricing applies.
3. How much does Shopify take from a $100 sale?
On the Basic plan using Shopify Payments, Shopify charges 2.9% + 30¢ per transaction. For a $100 sale, you’ll pay about $3.20 in processing fees.
4. Is Shopify worth it for beginners?
Yes, Shopify is beginner-friendly with intuitive setup, customizable themes, and built-in tools for payments, shipping, and marketing, making it ideal for launching and managing an online store without coding skills.
5. What are the hidden fees on Shopify?
Shopify has no hidden fees; however, additional costs may include third-party payment gateway charges, premium themes, and paid apps, depending on your store’s specific needs and integrations.
Heading

End-to-end traceability
To ensure regulatory compliance, you must have a complete overview of your products from production to shipping. Book a demo to see how Katana can give you full visibility of your operations.

.png)
.png)